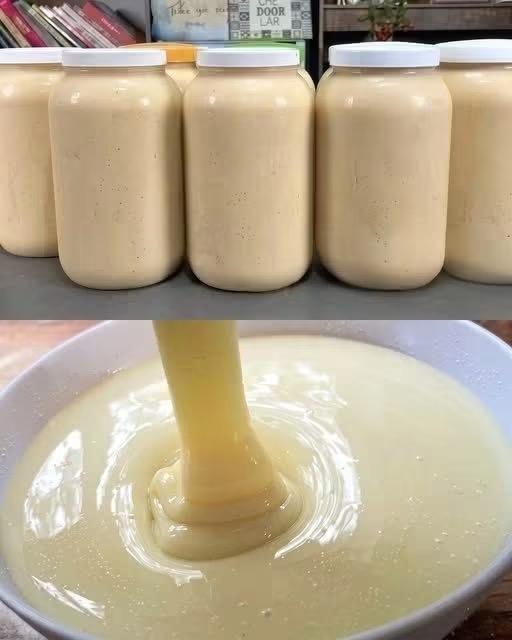
Traditional sweetened condensed milk is packed with sugar and heavy carbohydrates, but making your own Sugar-Free Condensed Milk at home requires just 3 simple ingredients and costs a fraction of store-bought specialty cans.
Thick, creamy, and naturally sweet, this keto-friendly condensed milk melts seamlessly into hot coffee, low-carb desserts, fudge, ice creams, and pie fillings without any sugar spikes or artificial aftertaste.
Why You’ll Love This Homemade Recipe
Just 3 Simple Ingredients: Uses basic kitchen staples with zero hidden preservatives.
Sugar-Free & Low-Carb: Completely free from refined sugars, making it keto-friendly and diabetic-safe.
Economical & Meal-Prep Friendly: Whip up a large batch to keep in mason jars for all your baking and coffee needs throughout the month.
Kitchen Tools Needed
Medium Heavy-Bottomed Saucepan: Prevents scorching while simmering the cream and sweetener down into a thick syrup.
Silicone Spatula or Whisk: Keeps the sweetener fully dissolved and prevents sticking along the sides.
Glass Mason Jars with Lids: Ideal for storing and sealing individual batches in the fridge as pictured.
Ingredients
2 cups (480ml) Heavy whipping cream (or full-fat canned coconut cream for a dairy-free option)
3 tbsp (45g) Unsalted butter
1/2 cup (96g) Powdered Allulose or Powdered Erythritol/Monk Fruit (Allulose is recommended for the smoothest, non-crystallizing texture)
Step-by-Step Instructions
Step 1: Combine the Base
1. In a medium heavy-bottomed saucepan set over medium heat, melt the unsalted butter.
2. Pour in the heavy whipping cream and add the powdered sweetener.
3. Whisk continuously until the sweetener is completely dissolved and the liquid starts to gently bubble.
Step 2: Simmer & Reduce
1. Reduce the heat to low so the mixture stays at a steady, gentle simmer.
2. Allow it to cook uncovered for 20 to 25 minutes, stirring frequently with a silicone spatula to prevent burning on the bottom.
3. The liquid should reduce by about half and coat the back of a spoon with a silky, golden hue.
Step 3: Chill & Thicken
1. Remove the saucepan from the heat. (The mixture will look slightly thinner while hot, but it will thicken dramatically as it cools!)
2. Pour the condensed milk into clean glass mason jars and let it cool completely at room temperature.
3. Seal with a tight lid and place in the refrigerator for at least 2 hours to reach full, pourable condensed milk thickness.
Chef’s Tips & Smart Substitutions
Why Allulose is Best: Allulose behaves almost identically to real sugar—it caramelizes gently and stays perfectly liquid when chilled in the fridge. Erythritol works as well, but may form tiny crunchy crystals once cold.
Dairy-Free Alternative: Swap the heavy cream for full-fat canned coconut cream and use vegan butter or coconut oil.
Add Vanilla Extract: Stir in 1 teaspoon of pure vanilla extract right after taking the pan off the heat for an extra rich flavor profile.
Nutritional Breakdown (Per 2 tbsp Serving)
Servings: 16 portions (approx. 2 cups total)
Calories: ~70 kcal
Protein: 0.5g
Net Carbs: < 0.5g
Fat: 7g
Frequently Asked Questions (FAQ)
How long does homemade sugar-free condensed milk last?
Stored in an airtight glass jar in the refrigerator, this condensed milk stays fresh and thick for up to 2 to 3 weeks.
Can I freeze it for later use?
Yes! You can freeze it in freezer-safe jars or silicone ice cube trays for up to 3 months. Thaw it overnight in the fridge and give it a quick whisk before using.