If you need a dessert that is incredibly quick, shockingly light, and completely foolproof, this viral 3-Ingredient Cherry Angel Cloud Cake is your absolute best bet. By combining a sweet, fruity cherry pie filling directly into a classic angel food cake mix, you get a unique, ultra-moist cake texture that rises beautifully without needing eggs, oil, or water. Topped with a fluffy layer of whipped topping and an optional sprinkle of sliced almonds, it looks like an elegant, gourmet dessert with a fraction of the effort!
Ingredients
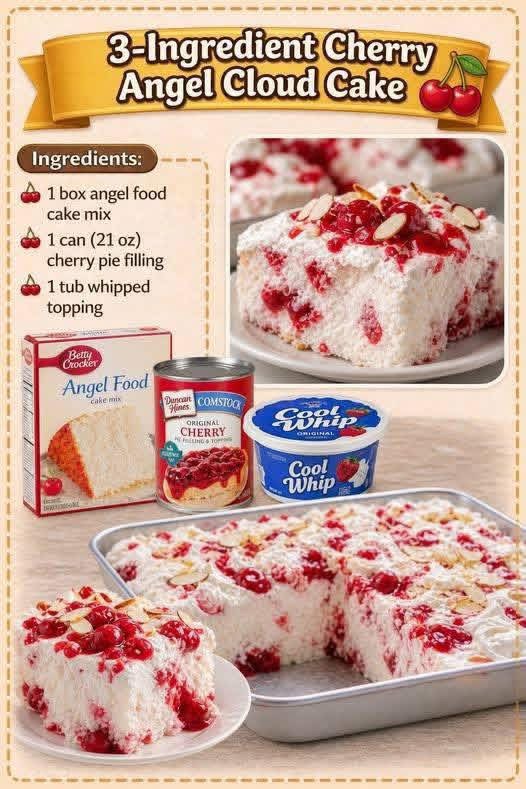
1 box (approx. 16 oz) angel food cake mix (just the dry mix, do not follow the box instructions)
1 can (21 oz) cherry pie filling
1 tub (8 oz) whipped topping (like Cool Whip, thawed)
Optional crunch: 2-3 tbsp sliced almonds (as featured in the final serving preview in image_85.png)
Instructions
1. Prep and Preheat
Preheat your oven to 350°F (175°C). Grab a 9×13-inch metal or glass baking pan. Do not grease the pan! Angel food cake needs to cling to the dry sides of the pan as it bakes to achieve its signature airy, cloud-like rise.
2. Mix the Cake Base
In a large mixing bowl, empty the contents of the dry angel food cake mix box. Pour the entire can of cherry pie filling directly over the powder. Using a sturdy rubber spatula or wooden spoon, gently stir the two ingredients together. You will notice the batter start to foam, bubble, and lighten in color as the moisture activates the cake mix. Stir just until all the dry spots disappear and the cherries are evenly marbled throughout.
3. Bake Until Golden
Pour the thick, pink-marbled batter into your ungreased 9×13-inch pan, smoothing it out into the corners. Bake at 350°F (175°C) for 28 to 32 minutes. The cake is done when the top is a deep golden brown, springs back lightly when touched, and a toothpick inserted into the center comes out clean.
4. Cool Completely
Remove the pan from the oven and place it on a wire rack. Let the cake cool completely to room temperature (about 1 hour). If you try to frost it while it’s warm, the whipped topping will melt right into the cake!
5. Layer the Topping
Once fully cooled, use an offset spatula to spread the thawed whipped topping evenly across the entire surface of the cake, creating a thick, cloud-like layer. If you want to match the gorgeous presentation shown in image_85.png, scatter a handful of sliced almonds across the top for a lovely visual contrast and a delicate crunch.
6. Chill and Slice
For the absolute best texture, place the assembled cake into the refrigerator for at least 30 minutes before slicing. Cut into square portions and serve cold right out of the pan, showcasing the beautiful red-and-white marbled crumb visible in the sliced pieces of image_85.png!