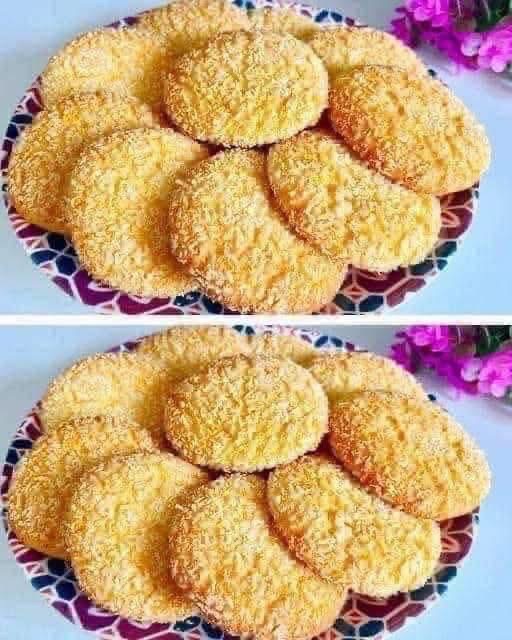
Ingredients
The Cookie Dough:
\frac{1}{2} cup (115g) unsalted butter, softened to room temperature
\frac{1}{2} cup (100g) granulated white sugar
1 large egg
1 tsp vanilla extract
1 \frac{1}{2} cups (185g) all-purpose flour
\frac{1}{2} tsp baking powder
A pinch of salt
The Crispy Coating:
\frac{1}{2} cup unsweetened shredded or desiccated coconut (placed in a shallow bowl)
🥣 Directions
Step 1: Cream the Base
Preheat your oven to 350°F (175°C) and line a large baking sheet with parchment paper. In a medium bowl, use a hand mixer or wooden spoon to beat the softened butter and white sugar together for about 1 to 2 minutes until the mixture looks light, fluffy, and smooth.
Step 2: Add the Wet Ingredients
Add the egg and vanilla extract to the creamed butter. Beat vigorously until fully incorporated and creamy.
Step 3: Form the Dough
Sift in the all-purpose flour, baking powder, and a pinch of salt. Stir gently with a spatula just until the flour disappears and a soft, non-sticky cookie dough forms.
Step 4: Shape and Coat (The Signature Texture)
Scoop out about 1 tablespoon of dough and roll it into a smooth ball between your palms. Gently flatten the ball slightly into an oval or round disc. Drop the disc directly into the bowl of shredded coconut, pressing down gently so the coconut coats the top and edges completely.
Step 5: Press the Design
Place the coated cookies onto your prepared baking sheet. To get that beautiful textured look seen in the photo, you can gently press the top of each cookie with the flat grid of a potato masher, a mesh strainer, or simply cross-hatch them with the tines of a fork.
Step 6: Bake and Cool
Bake for 10 to 12 minutes. Watch them closely—you want the edges and the coconut coating to turn a gorgeous, light golden brown while the centers remain beautifully soft. Let them cool on the pan for 5 minutes before moving them to a wire rack. Serve warm with a cup of tea or coffee!