Ingredients
• Sweet Base: 1 can (14 oz) Sweetened Condensed Milk.
• Texture & Flavor: 2 cups (approx. 340g) White Chocolate Chips or Peanut Butter Chips (depending on your flavor preference).
Preparation Steps
1. Prep the Pan: Line an 8×8 inch square baking pan with parchment paper, leaving a little overhang on the sides so you can easily lift the fudge out later.
2. Combine: In a medium microwave-safe bowl, combine the sweetened condensed milk and the chips.
3. Melt: Microwave in 30-second intervals, stirring thoroughly in between each session. This is important! If you heat it too long without stirring, the mixture will seize and become grainy.
4. Smooth It Out: Once the mixture is completely smooth and glossy, pour it into your prepared pan. Use a spatula to smooth the top.
5. Set: Let the fudge sit at room temperature for about an hour, then move it to the refrigerator for at least 2–3 hours until firm.
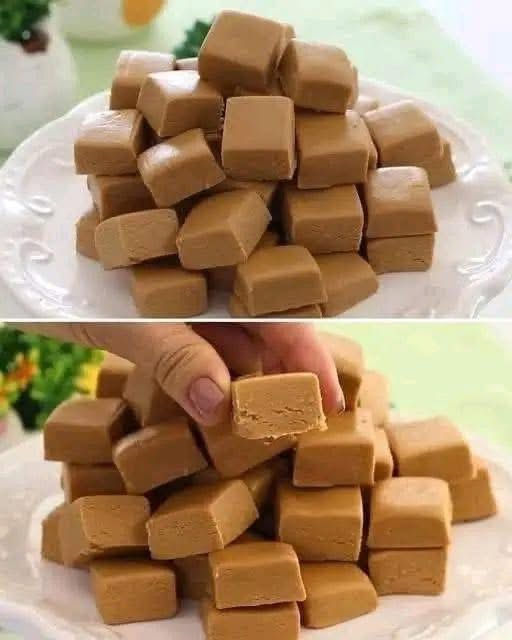
6. Slice: Use the parchment paper “handles” to lift the block out of the pan. Slice into small, uniform squares as seen in your photo.
The “Healthy Treasure” Swap (No Sugar)
To make these blood-sugar friendly and fit your personal diet, try this version:
• The Milk: Use 1 cup of Sugar-Free Condensed Milk (you can make this by simmering heavy cream and a keto sweetener like Allulose until thickened).
• The Chips: Use 2 cups of Sugar-Free White Chocolate Chips (like Lily’s brand).
• Follow the same melting steps! The result is just as creamy but completely sugar-free.
Pro Tips
• The Clean Cut: To get those perfectly sharp edges shown in your picture, run your knife under hot water and wipe it dry before each slice.
• Storage: These stay fresh in an airtight container in the fridge for up to two weeks—if they last that long!